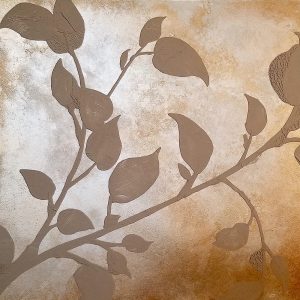
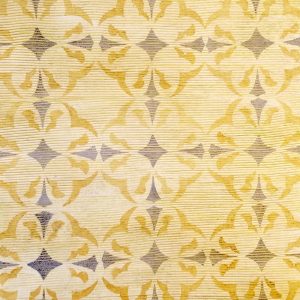
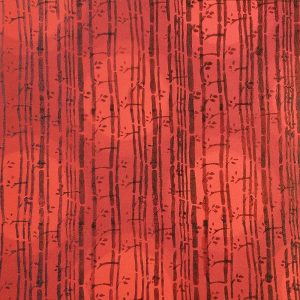
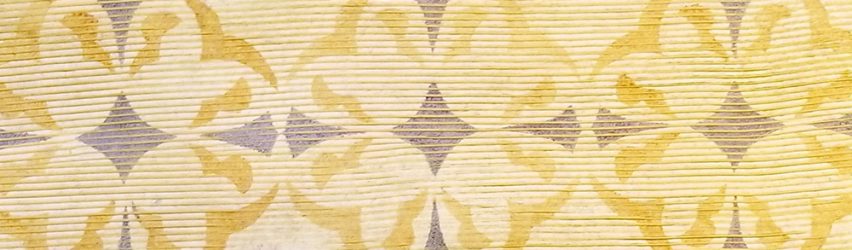
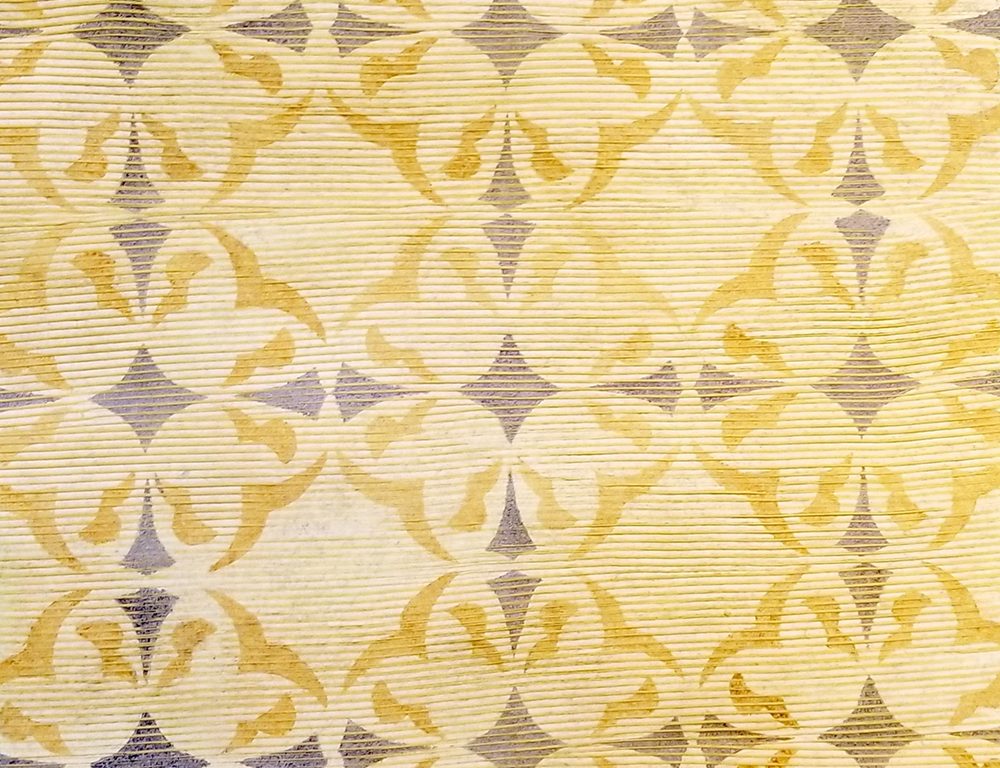
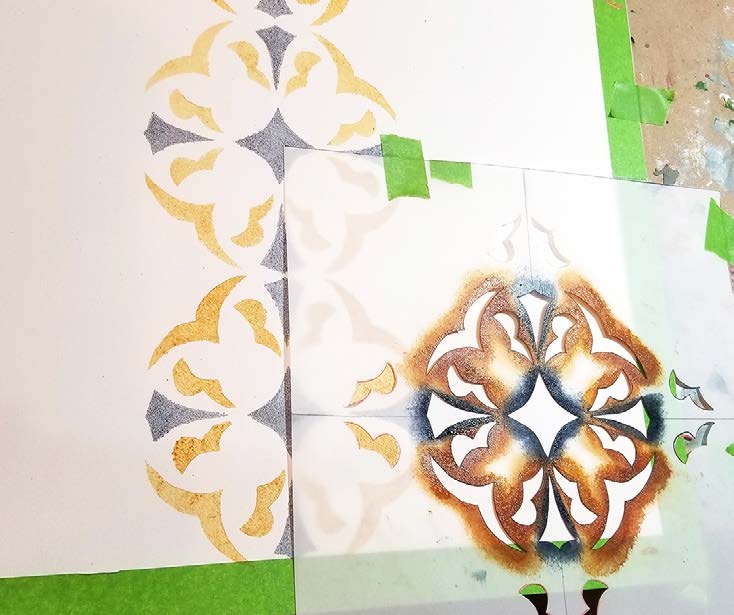
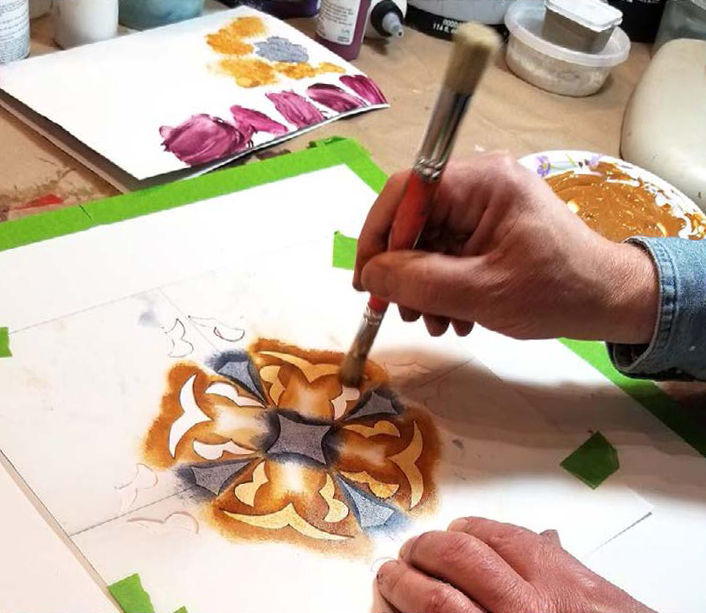
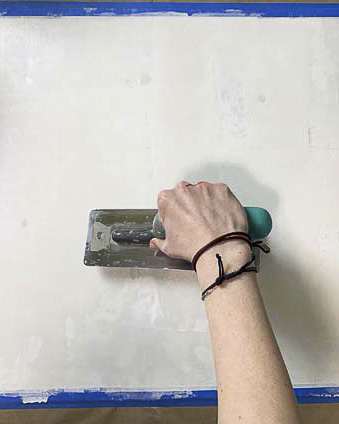
Decorative Finish: After the Rain

After the Rain decorative finish
DECORATIVE FINISH HOW-TO

After the Rain

Artist: Art Deco Unique

Share this article

PROJECT SUPPLIES:

INSTRUCTIONS:

1 | Prime the surface with an appropriate, high-quality, water-based primer with the low nap roller and allow to fully dry.
(Photo 1)

2 | Using the medium plaster trowel, apply a thin layer of Soapstone and let dry.
(Photo 2)

3 | Apply a thin layer of Metallic Texture Tint Base Pearl. Let dry.
(Photos 3-4)

4 | Mix the following colors:

4a.) One cup Metallic Texture Tint Base Pearl with (approx.) one teaspoon Pre-Mixed Metallic Paint Soft Gold.

4b.) One cup Metallic Texture Tint Base Pearl with (approx.) one teaspoon Pre-Mixed Metallic Paint Moody.

4c.) One cup Metallic Texture Tint Base Pearl with (approx.) one teaspoon Pre-Mixed Metallic Paint Future.

4d.) One cup Metallic Texture Tint Base Pearl with (approx.) one teaspoon Pre-Mixed Metallic Paint Splendor.

(Photo 5)

5 | Apply an even, thin layer of the 4a mixture from Step 4 on the whole surface area using the medium plaster trowel.
(Photo 6)

6 | Apply the rest of the 4b, 4c, and 4d mixtures from Step 4 using a painting knife or small spatula, and gently drag the material in a vertical direction.
(Photo 7)

7 | Add Metallic Texture Tint Base Pearl (approx. one teaspoon) on your medium plaster trowel or on the blue blade spatula. Start blending the colors by pressing slightly until you reach the desired design.
(Photo 8)

Tip: Try to move the trowel/spatula vertically so you get a strié effect.

Here is the final texture.
(Photo 9)

Featured Products

Art Deco Unique

About the Artists
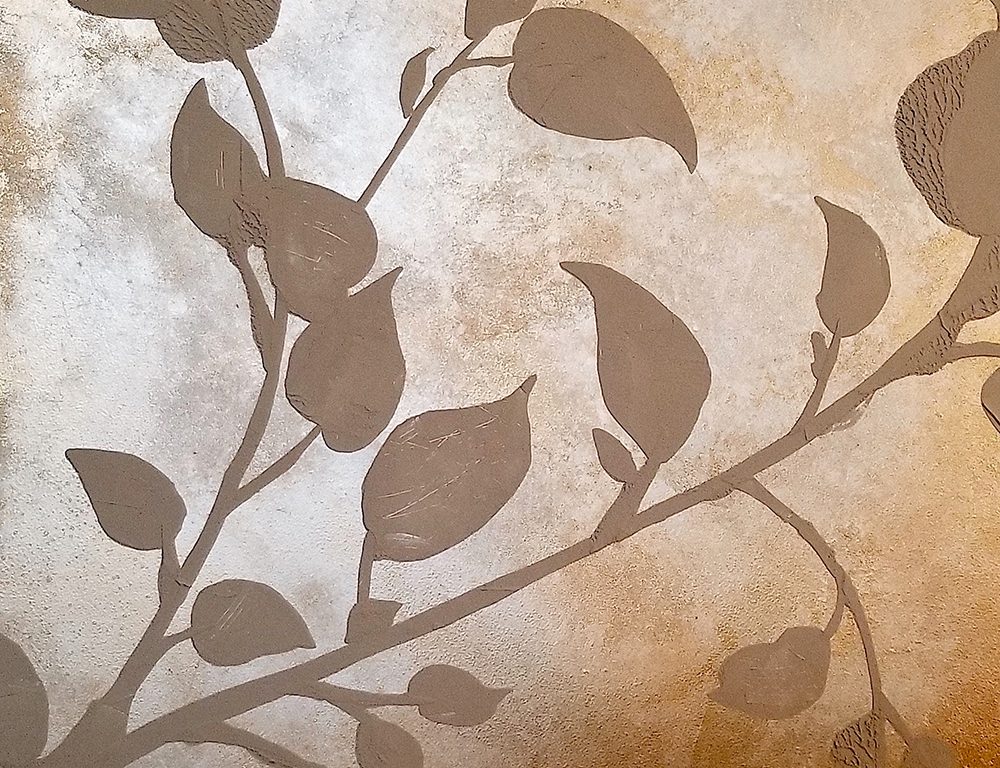
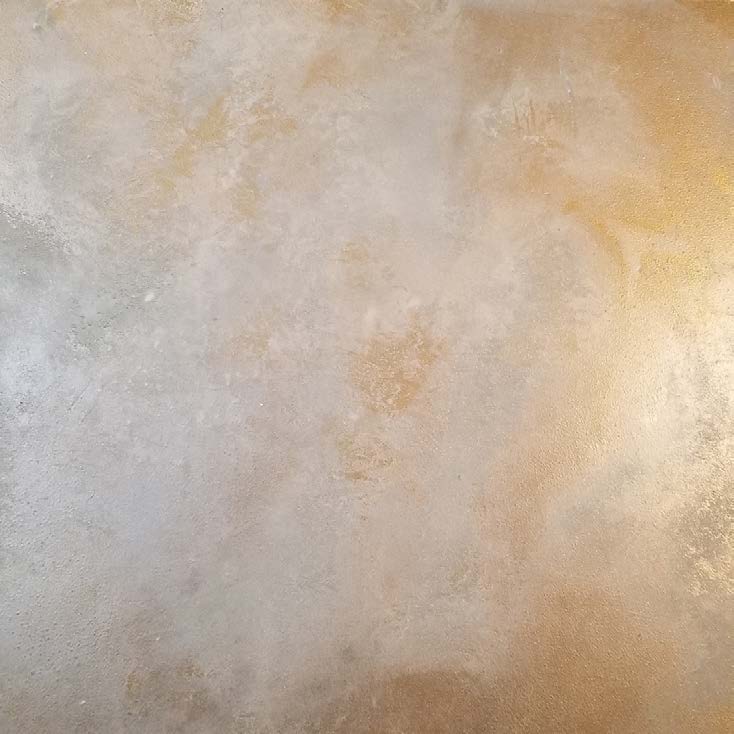
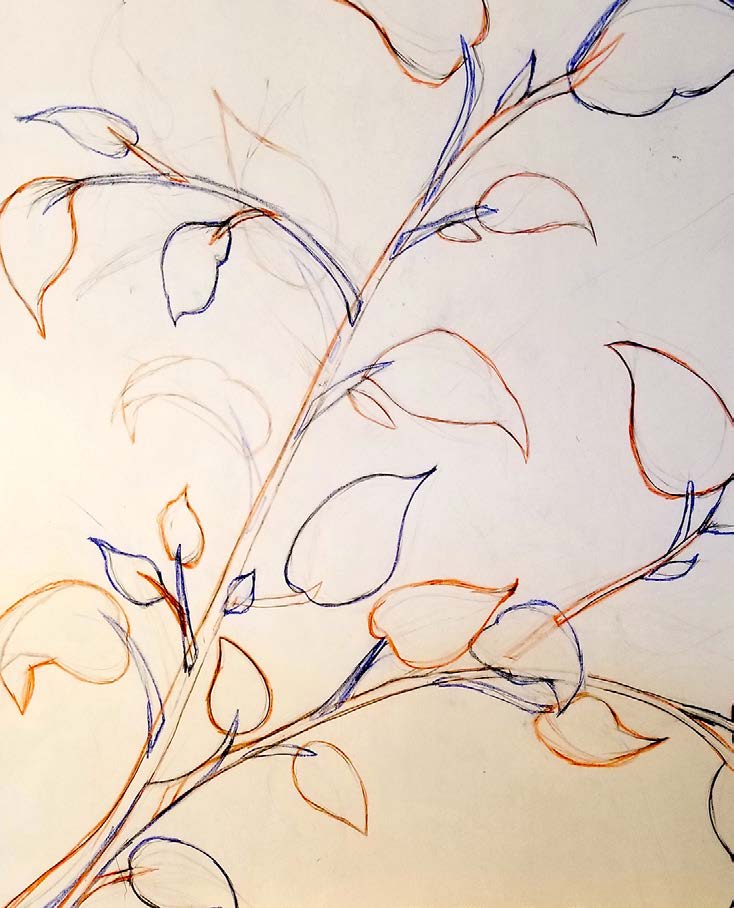
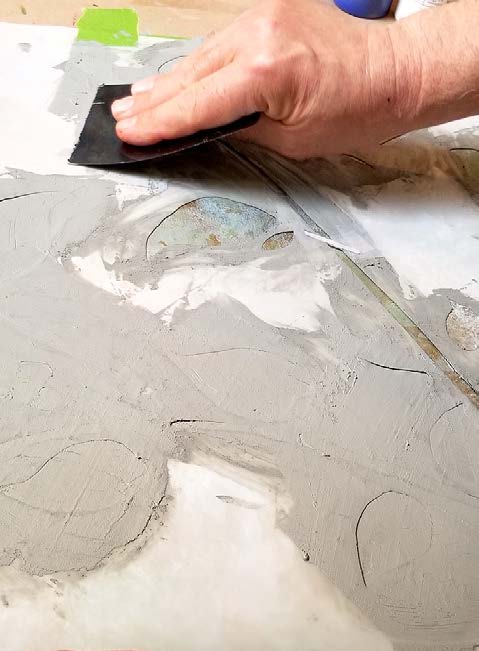
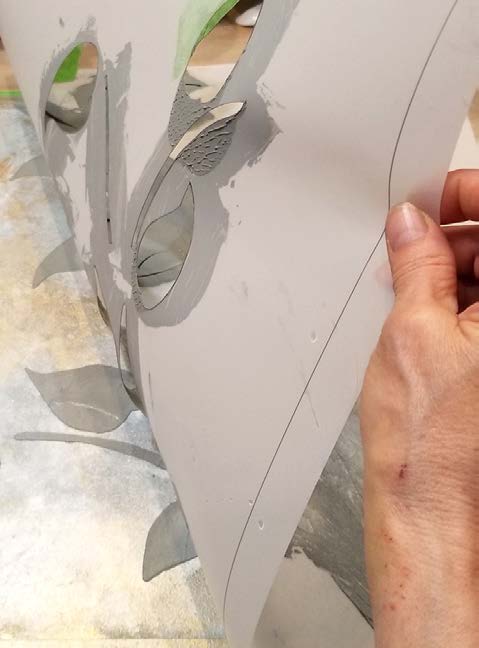
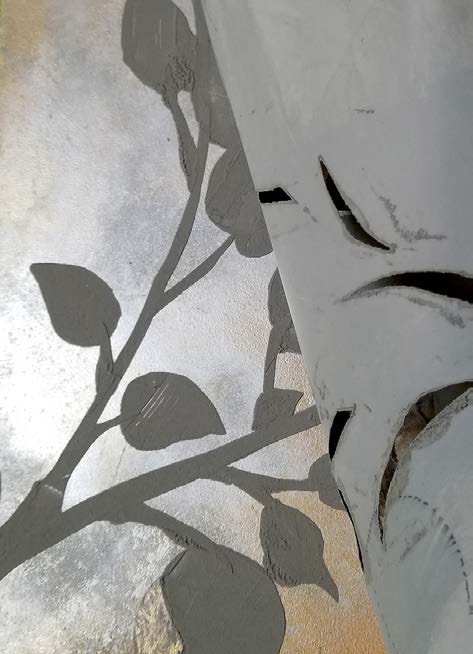
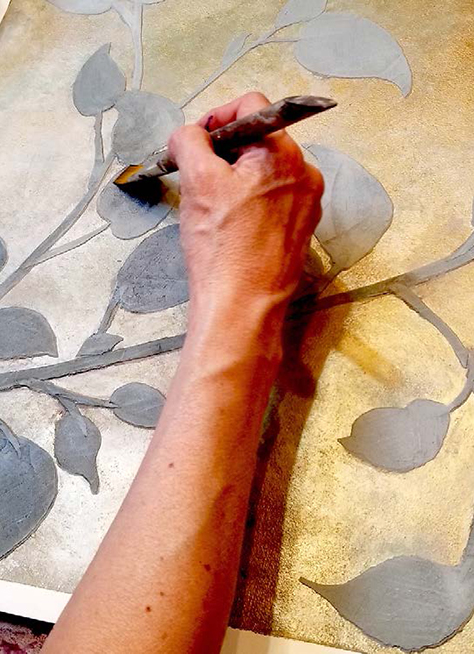
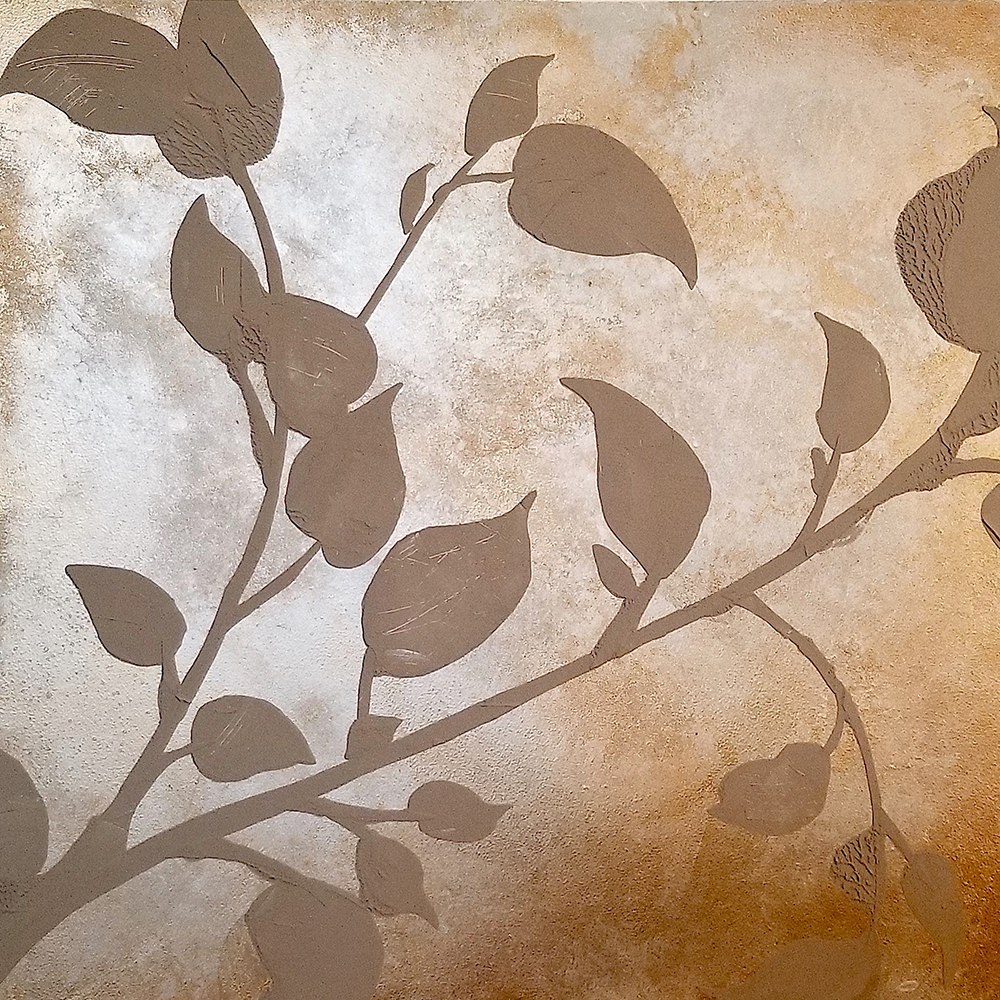
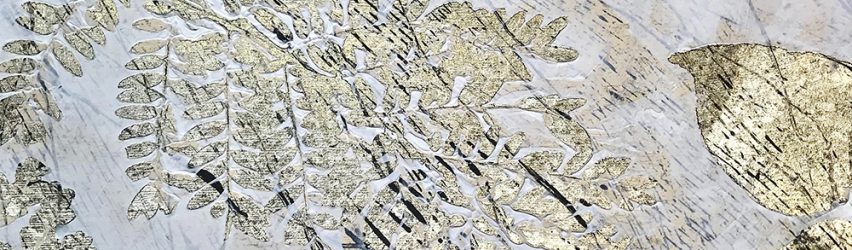
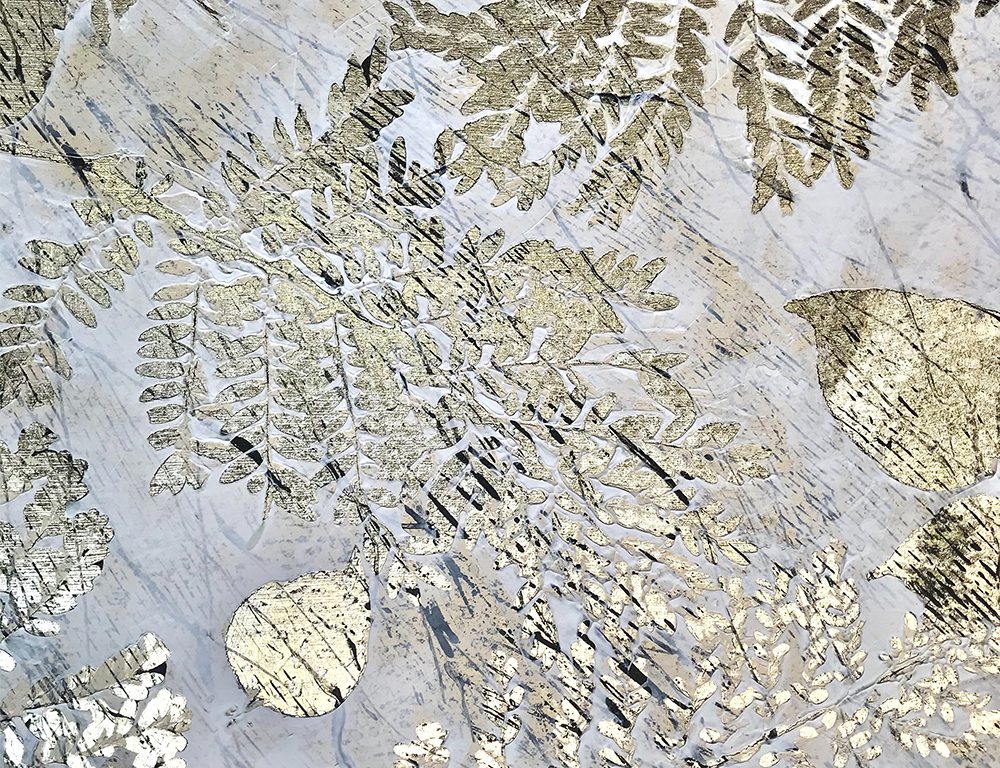
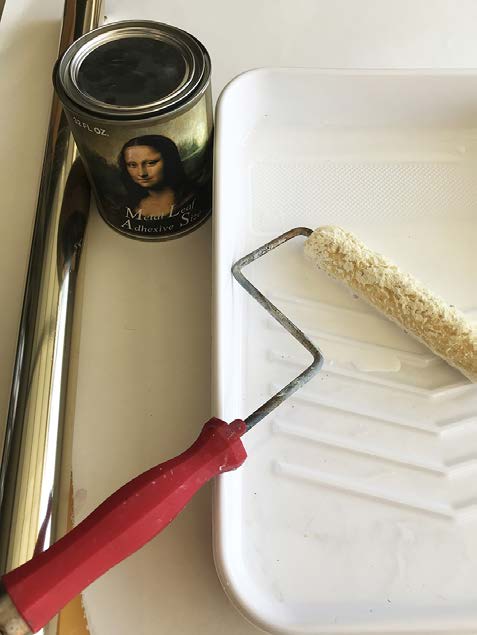
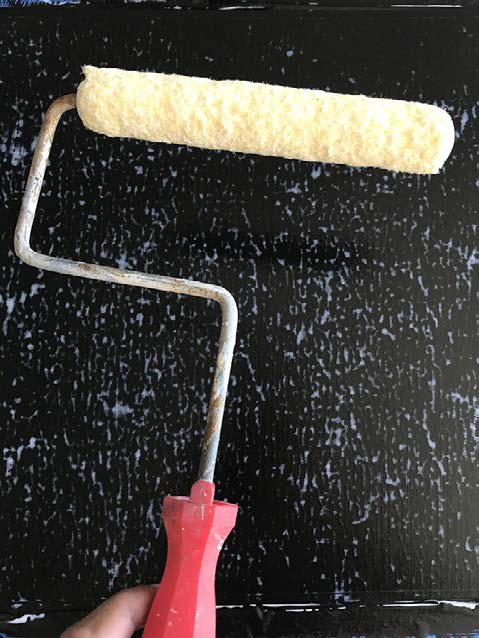
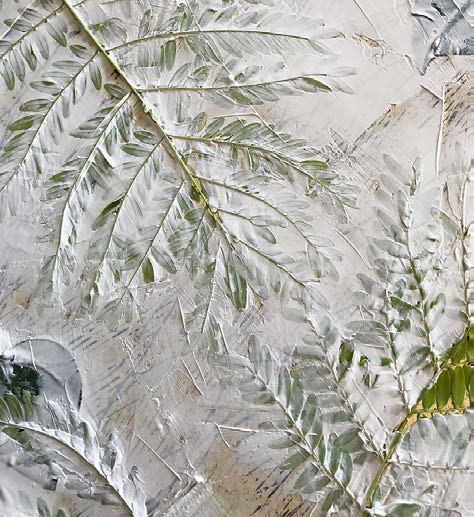
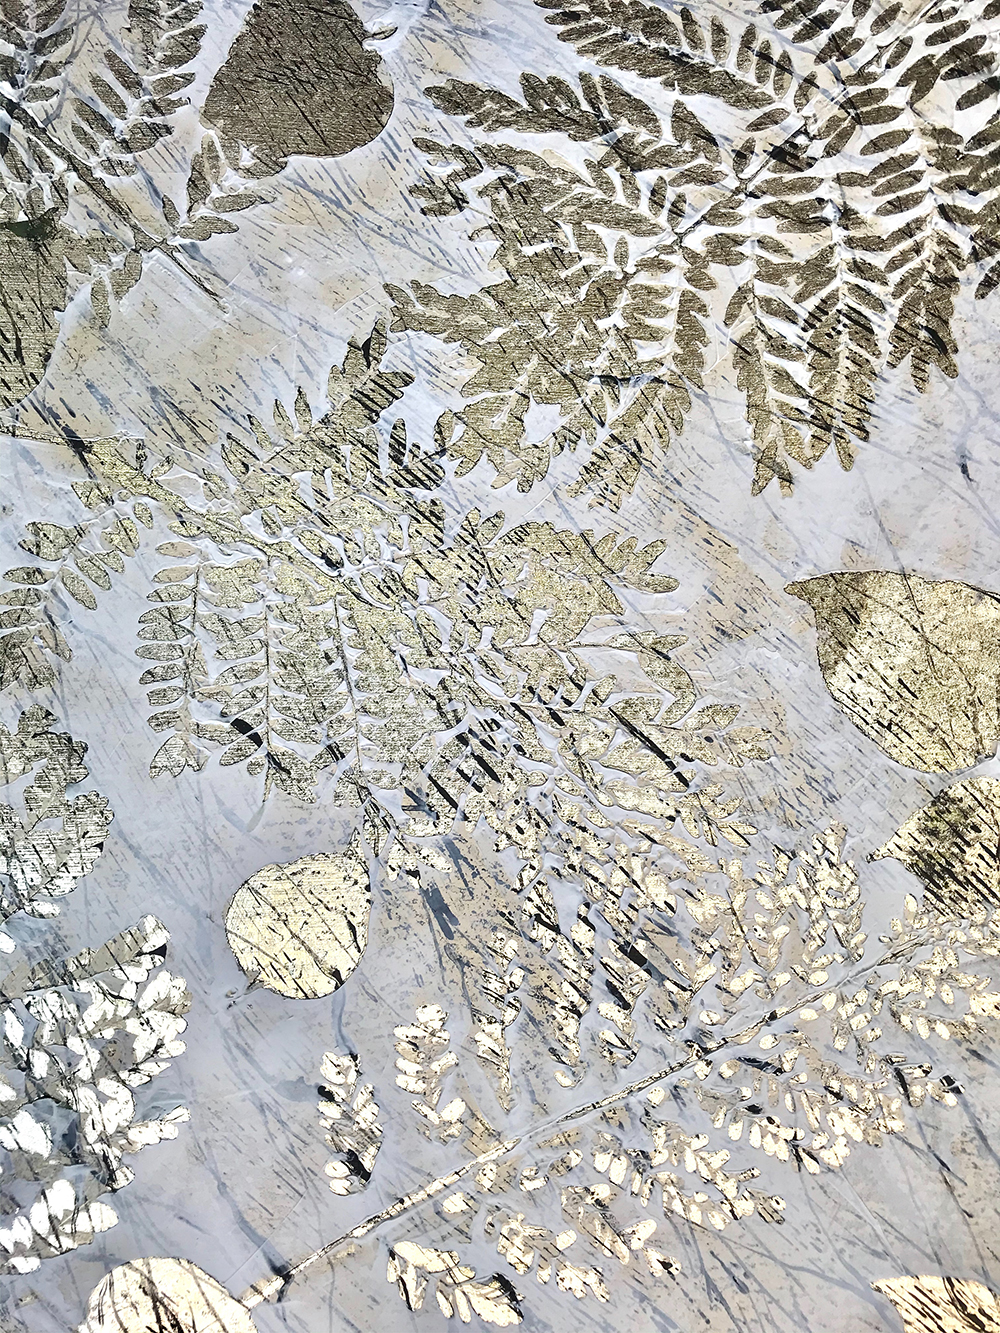
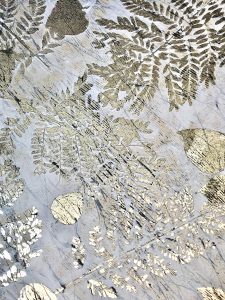
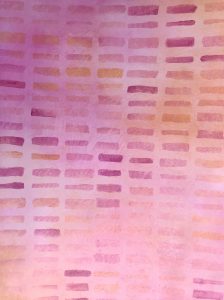
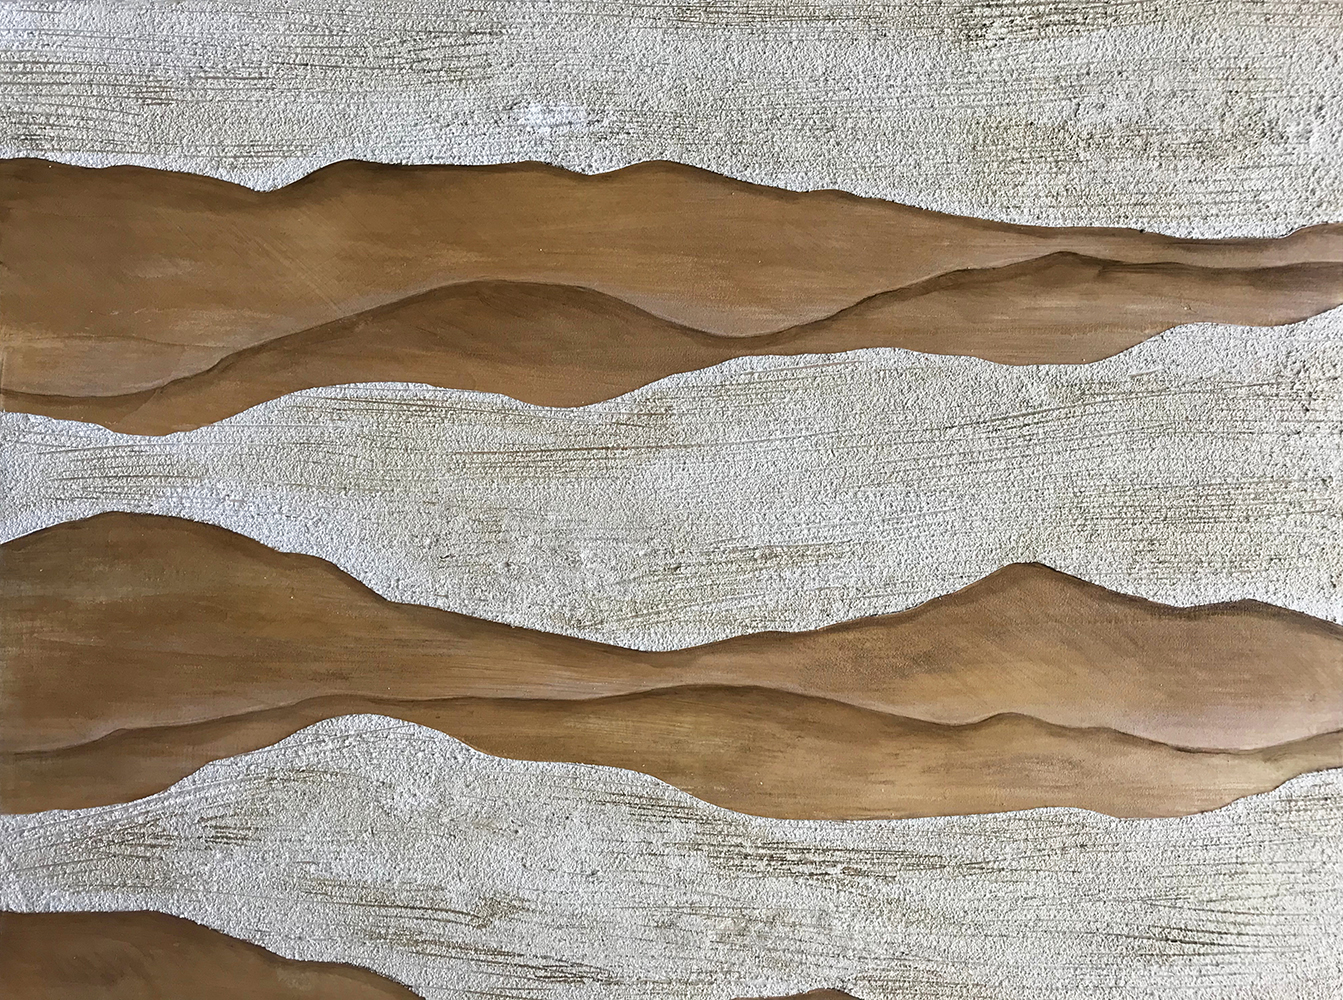
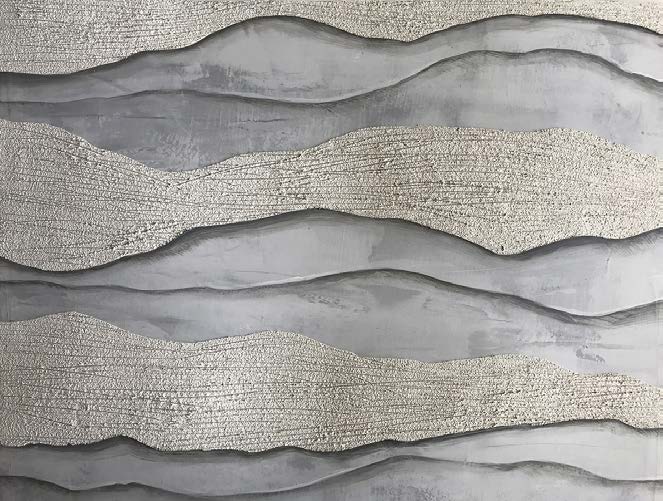
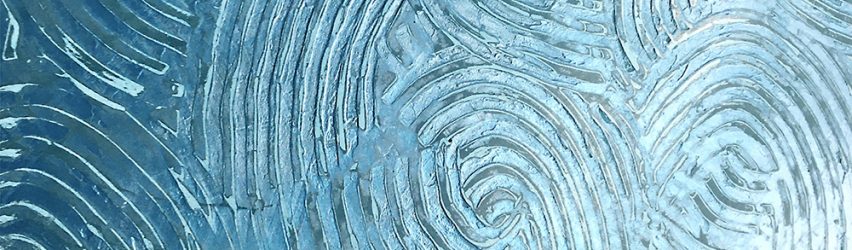
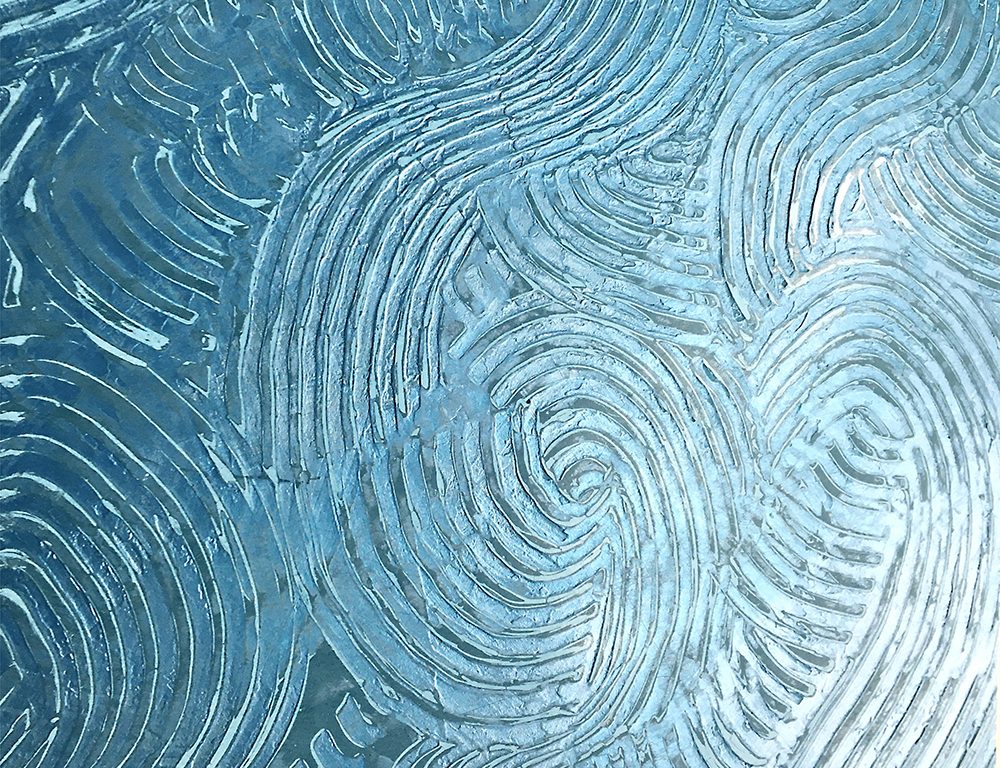
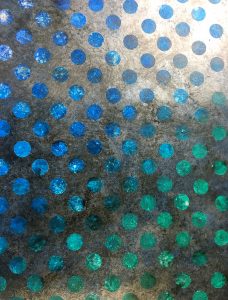
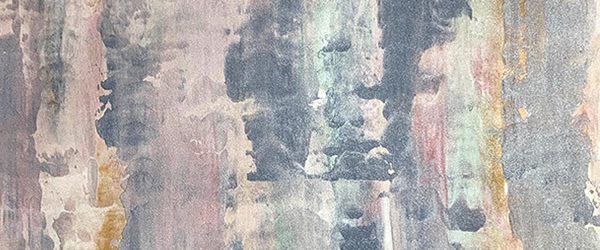
Elena and Rodica are two prosperous and hardworking individuals united by a common interest and artistry. E & R Wall Art by Art Deco Unique are open to travel and collaboration with designers, contractors, businesses, and homeowners. Based in New York with an Eastern European background, they learned to thrive open-minded and border-less. Each wall art commission consistently requires individual touch and specific combination of technics. Elena graduated as a Fashion Designer in 2010, and Rodica graduated as a Mural Artist in Design and Decorative in Design and Decorative Arts in 2006. Their years of experience in Murals, Gilding, Mosaic, and Decorative Finishes, along with academic achievements and diverse artistic skills, demonstrate imminent triumph and delight through their Wall Art and Design. Art Deco Unique brings joy by doing what they love, and their talent is recognized at national and international competitions, winning multiple awards along the years. The experience gained from multiple projects, combined with their knowledge and curiosity, engaged a beautiful cooperation between them and the versatility of Golden Paintworks products. Rodica and Elena are excited for challenges and new opportunities to dig into their luggage full of ideas.

More from this artist

Looking for more inspiration? Click here to view all of the decorative finishes from our Limited Edition Collections.

Decorative Finish: Vert de Gris Shadows

Vert de Gris Shadows by True Faux Studio
DECORATIVE FINISH HOW-TO

Vert de Gris Shadows

Artist: True Faux Studio

Share this article

INSTRUCTIONS:

1 | Base coat with Metallic Paint Tint Base Bronze. Apply 2 coats.
(Photo 1)

2 | Creating the Vert de Gris Shadows background:

For the 1st pass: Trowel a 1:1 mix of Metallic Textures Tint Base Pearl and Glazing Gel. Let dry.

For the 2nd pass: Trowel a 2:1 mix of the 1st Pass Mix with a 1:1 mix of Slow Dry Fluid Acrylics Ultramarine Blue and Chromium Oxide Green. Let dry. 

The colors are variable, but keep them soft and diffused. Use a damp sponge to soften both passes.
(Photo 2)

3 | Draw a leaf pattern and cut a two-part stencil.
(Photo 3)

TIP: A one part stencil is fine but the overlaps and fullness of the pattern lends a realistic effect.

4 | Mix Sandstone with Slow Dry Fluid Acrylics Ultramarine Blue, Chromium Oxide Green, and Carbon Black for a gray-brown tone. Apply Sandstone through stencil with 3.5″ Blue Blade Spatula. Pull up the stencil immediately and check for and clean any bleeds. Clean the stencil and let the layer dry.
(Photos 4-5)

5 | If using a two-part stencil, repeat Step 4 with the second stencil overlay. Let dry completely.
(Photo 6)

6 | OPTIONAL: After the Sandstone has dried, you can tone the color of the embossed stencil pattern to taste. We toned it to a warmer color. You have full control of the look and color of the dimensional pattern anytime.
(Photo 7)

Here is the final texture.
(Photo 8)

Decorative Finish: Geo Textile Square

Geo Textile Square by True Faux Studio
DECORATIVE FINISH HOW-TO

Geo Textile Square

Artist: True Faux Studio

Share this article

PROJECT SUPPLIES:

INSTRUCTIONS:

1 | Base coat with a white latex paint in a satin sheen. Let dry. Create or buy a textile pattern stencil to cover an 18” square. We made a 6″ stencil and repeated it 9x.
(Photo 1)

2 | Create the following medium and color mixes:

Medium: Mix 1:1 Golden Artist Colors Matte Medium and Clear Top Coat Dead Flat

From this medium make 2 colors at 1:1 ratio:
Color 1: Theme Paint Transparent Brown Oxide with Slow Dry Fluid Acrylic Ultramarine Blue
Color 2: Theme Paint Transparent Brown Oxide and Transparent Yellow Oxide

3 | Use the colors from Step 2 to stencil in the design. Let dry.
(Photos 2-3)

4 | Sponge a very transparent mixture of Golden Artist Colors Matte Medium with a cool gray color to tone and texture. Create the gray color with a 1:1 ratio of Theme Paint Transparent Black Oxide and Slow Dry Fluid Acrylic Ultramarine Blue.
(Photo 4)

5 | Blade Soapstone mixed with Theme Paint Transparent Yellow Oxide in one direction. Keep wet. Using a metal comb, pull through straight as possible in the same direction. Let dry.
(Photo 5)

6 | Tone the top with two washes. Use each of the stencil colors with the medium from Step 2 and add a drop of the Slow Dry Fluid Acrylic Chromium Oxide Green. Dilute with water to a thin wash. Apply randomly and loosely with a chip brush to give it a woven-like patina. Let dry.
(Photo 6)

Here is the final texture.
(Photo 7)

Decorative Finish: Blue Mica Pearl

Blue Mica Pearl by True Faux Studio
DECORATIVE FINISH HOW-TO

Blue Mica Pearl

Artist: True Faux Studio

Share this article

PROJECT SUPPLIES:

INSTRUCTIONS:

1 | Base coat with Benjamin Moore Woodlawn Blue HC147. Let dry completely.
(Photo 1)

2 | Make two color mixes:

Blue Mix: 1:1 Soapstone and Glazing Gel. Add a 1:1 mix of Slow Dry Fluid Acrylics Ultramarine Blue and Chromium Oxide Green.
(Photo 2)

Yellow Mix: 1:1 Soapstone and Glazing Gel. Add a very small amount of Theme Paint Transparent Yellow Oxide. Set this color aside for now.
(Photo 3)

3 | Using the blue mix first, sponge on with a damp, wrung out sea sponge, and soften. Make sure not to leave sponge marks. Let dry completely. For the second layer, lightly sponge in the yellow mix at approx. 20%, creating a subtle warm toning over the blue. Let dry.
(Photo 4)

4 | Mix 50% Golden Artist Colors Pearl Mica Flakes (Small) with Metallic Textures Tint Base Pearl and 25% Glazing Gel.Pounce with the material to cover your area. Let dry.
(Photos 5-6)

5 | With the same mix as in Step 3, add a liberal amount of Large Muscovite Flakes and water to make a watery paste. Stir frequently.
(Photo 7)

6 | Pounce again, making sure you are picking up the large flakes. After it dries, repeat.

TIP: After the finish is dry, you can come back with the mix from Step 2 plus a little Slow Dry Fluid Acrylic Carbon Black to deepen the tone, as seen in Photo 8. Use sparingly.

Here is the final finish.
(Photo 8)

Decorative Finish: Bamboo Sunset

Bamboo Sunset by True Faux Studio
DECORATIVE FINISH HOW-TO

Bamboo Sunset

Artist: True Faux Studio

Share this article

PROJECT SUPPLIES:

INSTRUCTIONS:

1 | Base coat with Sherwin-Williams Lusty Red 6863. Let dry completely.
(Photo 1)

2 | Cut or buy circles from a masking film or frisket. You can also order custom made vinyl stencils with this pattern. We used a compass type cutter, like the Olfa Rotary Circle Cutter. Cut concentric circles with the inside diameter at 4.5″ and the outside at 6″. Lay them out on a diagonal. Place the first 4.5″ circle film and measure 10″ vertically from the circle center point, marking the next circle center point on tape to keep the surface clean. Then, from the original circle center point measure 5″ up and 5″ across at a right angle to locate the next circle center. Continue to locate the circles in your pattern.

At this point, remove the film backing and place the 4.5″ film (inner circle) on the marked tape points and place the outer ring around the inner circle.
(Photo 2)

3 | Prepare the following separately, then mix:

Glaze: 1:1 mix Golden Artist Colors Matte Medium and Clear Top Coat Dead Flat

Color: Equal parts Slow Dry Fluid Acrylics Pyrrole Red Light and Quinacridone Magenta with 25% Dioxazine Purple, and approx. 3-5% Carbon Black

4 | Test the glaze — keep it very transparent. Keep a bit of the color aside for the stenciling. Glaze over the 2-part frisket pattern and let dry completely.
(Photo 3)

TIP: If covering a large space change the glaze formula to 1:1 Glazing Medium and Sheer Glazing Medium, and let dry overnight.

5 | Leaving inside circles in place, lift the outer circles of the frisket pattern. Glaze over the entire surface again. Let dry.
(Photos 4-5)

6 | To finish, we made a 2-part bamboo stencil. You can also purchase one from your favorite stencil brand. For the color, we used the color from Step 3 and added approx. 20% more Slow Dry Fluid Acrylic Carbon Black. Add 50% Golden Artist Color Matte Medium to this mix. Roll with a 4″ foam roller, being careful not to let the material seep under the stencil.
(Photo 6)

7 | Let dry completely. Here is the final finish.
(Photo 7)

Featured Products

About the Artists
True Faux Studio owners Ginger Andro and Chuck Glicksman are fine artists who’ve studied decorative painting at the School of Visual Arts, Parsons School of Design, and with European masters. True Faux Studio specializes in mural painting and design, faux marble painting, faux wood graining, stencil design, glazing, and gilding for homes and sacred spaces.

More from this artist

Looking for more inspiration? Click here to view all of the decorative finishes from our Limited Edition Collections.

Decorative Finish: White and Gold Botanical

White and Gold Botanical by Carmen Lomax
DECORATIVE FINISH HOW-TO

White and Gold Botanical

Artist: Carmen Lomax

Share this article

PROJECT SUPPLIES:

INSTRUCTIONS:

1 | Prep your surface with Sherwin-Williams Caviar 6990, and let dry. Then, roll on the Metal Leaf Adhesive Size. I chose to use a roller with a little nap for the sizing so that the transfer wasn’t perfect and showed some irregularities from the black underneath.
(Photos 1-2)

2 | Transfer your Champagne Foil with your preferred foil applicator once the sizing is tacky.
(Photo 3)

3 | Then, I went in with whatever I thought would give some interesting variety in line quality with the Slow Dry Fluid Acrylic Carbon Black. Here, I used a decorative roller and the Ralph Lauren teeth tool.
(Photos 4-6)

4 | I also used a shaper just to freehand some movement with some diagonal lines. This could be an interesting finish just as is but wait, here comes the fun part!
(Photos 7-8)

5 | Select a variety of leaves in your environment and lightly spray with some spray adhesive. A little goes a long way.
(Photo 9)

Set your foliage artfully on your gold base and very delicately using a flat 2-3 inch rubber wedge, force the Soapstone over your greenery.
(Photos 10- 11)

6 | Remove foliage. Be aware not to wait too long to remove or the leaves will dry with the product and it will become harder to remove. Let dry completely.
(Photo 12)

Here is the finished texture.
(Photo 13)

Featured Products

About the Artist
Carmen Lomax specializes in creative wall finishes for home decor, children’s rooms and commercial and residential spaces. She works directly with homeowners and business-owners, as well as help develop projects for interior designers, architects, and commercial developers. Design options range from wall finishing and texturing to thematic murals, ceilings and three-dimensional artwork. Absolutely any hand-painted technique can be incorporated, from loose and whimsical to fine art detail and photo-realism.
More from this artist

Looking for more inspiration? Click here to view all of the decorative finishes from our Limited Edition Collections.

Decorative Finish: Summer Confection

Summer Confection by Carmen Lomax
DECORATIVE FINISH HOW-TO

Summer Confection

Artist: Carmen Lomax

Share this article

PROJECT SUPPLIES:

INSTRUCTIONS:

1 | Mix the Venetian Plaster with the desired Slow Dry Fluid Acrylics Magenta coloration you like, keeping in mind that Venetian Plaster dries lighter. I would go just a shade darker than what you think you will need. Then, proceed with two coats of the Magenta Venetian Plaster as a base. Let dry.
(Photos 1-2)

2 | Mix three values of Slow Dry Fluid Acrylics into the Glazing Medium in three separate containers. I decided to use two values for the Magenta (a medium and a dark with a bit of Carbon Black) and then a Yellow Oxide coloration.
(Photo 3)

3 | Take a damp cloth and lightly dampen the Venetian Plaster base before starting to blend in your glaze colors, blending with a dabbing motion as well as side to side blending.
(Photos 4-5)

4 | Let dry while you prepare your stencil or template.
(Photo 6)

5 | At this point in the process, a stencil or vinyl could be used, but for sample purposes, I cut my own stencil. I lightly dabbed in the color glazes from Step 2, off loading on a separate towel if the color got too heavy.
(Photo 7)

6 | Once the graphic pattern was finished, I went back over the entire sample with more magenta and yellow glaze just to set the pattern back a bit. Here is the finished texture.
(Photo 8)

Featured Products

About the Artist
Carmen Lomax specializes in creative wall finishes for home decor, children’s rooms and commercial and residential spaces. She works directly with homeowners and business-owners, as well as help develop projects for interior designers, architects, and commercial developers. Design options range from wall finishing and texturing to thematic murals, ceilings and three-dimensional artwork. Absolutely any hand-painted technique can be incorporated, from loose and whimsical to fine art detail and photo-realism.
More from this artist

Looking for more inspiration? Click here to view all of the decorative finishes from our Limited Edition Collections.

Decorative Finish: Retro Maze

Retro Maze by Carmen Lomax
DECORATIVE FINISH HOW-TO

Retro Maze

Artist: Carmen Lomax

Share this article

PROJECT SUPPLIES:

INSTRUCTIONS:

1 | Prep in a solid latex black, here I used Sherwin-Williams Caviar 6990. Using the Soapstone, disperse the product in two containers and mix two complimentary values using the Slow Dry Fluid Acrylic Titanium White and Carbon Black to obtain two nice grays. (Ahh the versatility of Soapstone, have I mentioned I love this product!).
(Photo 1)

2 | Start laying on your two colors vertically simultaneously with a spatula.
(Photo 2)

Then, while still wet, I took my decorative weave pattern roller to add in a little texture. Move on to the next step while still wet.
(Photo 3)

3 | Allow the Soapstone to set up, and with the side of your trowel, slightly knock down some of the texture in places.
(Photo 4)

In hindsight, I wish I had left more of this texture to shine through, but remember, this is an art not a science, so it is up to the creator as to the look you would like to achieve. I then went over very lightly with more of both color mixtures in places.
(Photo 5)

4 | If this finish were to be done in a larger area, a stencil would improve production of the finish. For smaller more intimate areas, this technique should suffice. With this pattern, two different sizes of our graphic motif had to be drawn out (alternating with each new vertical row). The templates were cut out of styrene board.
(Photo 6)

5 | Outline your templates and vary between the white pen and the gold pen until the pattern is complete.
(Photo 7)

6 | Once dry, lightly sand the pattern with a medium grit sandpaper. I then finished with some additional sandstone, light gray mixture, over top the pattern in a couple of places.

Here is the final finish.
(Photo 8)

Featured Products

About the Artist
Carmen Lomax specializes in creative wall finishes for home decor, children’s rooms and commercial and residential spaces. She works directly with homeowners and business-owners, as well as help develop projects for interior designers, architects, and commercial developers. Design options range from wall finishing and texturing to thematic murals, ceilings and three-dimensional artwork. Absolutely any hand-painted technique can be incorporated, from loose and whimsical to fine art detail and photo-realism.
More from this artist

Looking for more inspiration? Click here to view all of the decorative finishes from our Limited Edition Collections.

Decorative Finish: Contemporary Mountainscape

Contemporary Mountainscape by Carmen Lomax
DECORATIVE FINISH HOW-TO

Contemporary Mountainscape

Artist: Carmen Lomax

Share this article

PROJECT SUPPLIES:

INSTRUCTIONS:

1 | Roll your surface with a neutral off white base coat and let dry. Proceed with one coat layered in with your trowel horizontally with Metallic Texture Tint Base Gold. It will appear uneven in terms of light areas and coverage but the lighter base coat telepathing through will give some nuance to your sections. Let dry.
(Photos 1-2)

2 | Skim coat Soapstone evenly over the Metallic Textures Tint Base Gold horizontally. Let dry.
(Photo 3)

3 | For your next step, you can always use stencil mylar, but here I used some drafting vellum because it is slightly thinner and easier to cut, plus you can sketch on it. Lay out and cut your mountainscapes, noting which sections are slated for the lighter Weathered Granite.
(Photos 4-5)

4 | Expose the first section to be treated. Next, prepare some Glazing Medium with Slow Dy Fluid Acrylic Raw Umber, not too dark, just enough to give some interest to our gold. Blend horizontally. Let dry.
(Photos 6-7)

5 | Cover the areas you just completed once dry, now exposing the areas to be done in Weathered Granite.
(Photo 8)

Here, I used a rubber blade but any spatula would do to trowel on the Weathered Granite.
(Photo 9)

While still wet, follow with a teeth tool and drag through horizontally.
(Photo 10)

Remove the acetate or vellum. Let dry.
(Photo 11)

6 | Using your same Raw Umber glazing solution from Step 4, add drop shadows and blend under each section.
(Photo 12)

And lastly, thinning out your umber solution a little more, add and wipe off with a damp cloth so that a little of that same color gets in the creases on your granite sections, tying everything together. Let dry completely.
(Photo 13)

Here is the finalized texture.
(Photo 14)

OPTION: I’ve also included another colorway in gray, so that you can see the versatility in tones.
(Photo 15)

Featured Products

About the Artist
Carmen Lomax specializes in creative wall finishes for home decor, children’s rooms and commercial and residential spaces. She works directly with homeowners and business-owners, as well as help develop projects for interior designers, architects, and commercial developers. Design options range from wall finishing and texturing to thematic murals, ceilings and three-dimensional artwork. Absolutely any hand-painted technique can be incorporated, from loose and whimsical to fine art detail and photo-realism.
More from this artist

Looking for more inspiration? Click here to view all of the decorative finishes from our Limited Edition Collections.

Decorative Finish: Wave

Wave by Arteriors
DECORATIVE FINISH HOW-TO

Wave

Artist: Arteriors

Share this article

PROJECT SUPPLIES:

INSTRUCTIONS:

Introduction: Iridescent blue waves play with light and pattern in this finish made from decorative plasters and metallic paint. This is an advanced finish, but if you love a good challenge that yields beautiful results, give this a try! If you do not know how to trowel, watch the Golden Paintworks tutorials on application methods for Venetian Plaster on their website.

1 | Prime the surface and allow to dry completely. Mix Venetian Plaster to Benjamin Moore Seaside Blue 2054-50, or color of your choice. Venetian Plaster colors can be tinted by your local Golden Paintworks retailer, or simply by tinting your own to taste. Trowel the plaster in a relatively thick layer.
(Photos 1-2)

2 | In up to 2′ x 2′ sections using a rubber wood graining comb, create a pattern by dragging the tool through the wet Venetian Plaster. Be creative and experiment on a separate board with wave shapes. Wipe excess plaster from the tool with a rag as you work. Move to the next section and repeat. Try to keep a wet edge between sections. Let dry.
(Photos 3-4)

3 | Wearing a dust mask, sand lightly with 220 grit sandpaper.
(Photo 5)

4 | Mix Venetian Plaster to Benjamin Moore Caribbean Blue Water 2055-30 or color of choice, and trowel over entire wave surface, filling in all the grooves left from the first combing layer. Scrape the surface with the edge of the trowel to keep the high points of the combed layer showing through the first layer. Let dry.
(Photos 6-7)

5 | Wearing a dust mask sand lightly with 220 grit sandpaper.
(Photo 8)

6 | Mix two parts Glazing Gel with one part Pre-Mixed Metallic Paint Reflection.
(Photo 9)

Paint over the entire surface with a brush.
(Photo 10)

While paint is still wet, scrape the entire surface with the edge of the trowel, wiping it off with a damp rag occasionally, to expose high points of wave pattern. Let dry completely.
(Photo 11)

7 | Wearing a dust mask, sand the surface with 220 grit sandpaper to expose the pattern.
(Photo 12)

If using a power tool, be gentle and do not sand too much at once or too fast. Using a sander with a vacuum attachment such as Festool Dust Extractor with a HEPA filter is the best kind of tool to use. Then sand lightly with 400 grit sand paper, then 600 to smooth and shine the high points. Burnish with a trowel. Wipe off surface. You are finished! 

Here is the finalized texture.
(Photo 13)

Featured Products

About the Artists
Amiel and Stephanie Mesner are a husband-and-wife team of fine artists who turned their love and knowledge of the fine and decorative arts into a company with over thirty-five years of experience, creating custom surface designs for the architectural and interior design industry. Arteriors, based in Natick, MA, handles professional design projects from idea and design creation through to finished application in a versatile, detail-oriented, expert manner. Dedicated to using eco-friendly decorative paint and plaster materials that are not only beautiful when applied, but responsible, Arteriors applies water-based paints and lime-based plasters, such as Venetian plasters, and American clay surface finishes which are safe, natural, and sustainable and can improve indoor air quality. 

More from this artist

Looking for more inspiration? Click here to view all of the decorative finishes from our Limited Edition Collections.