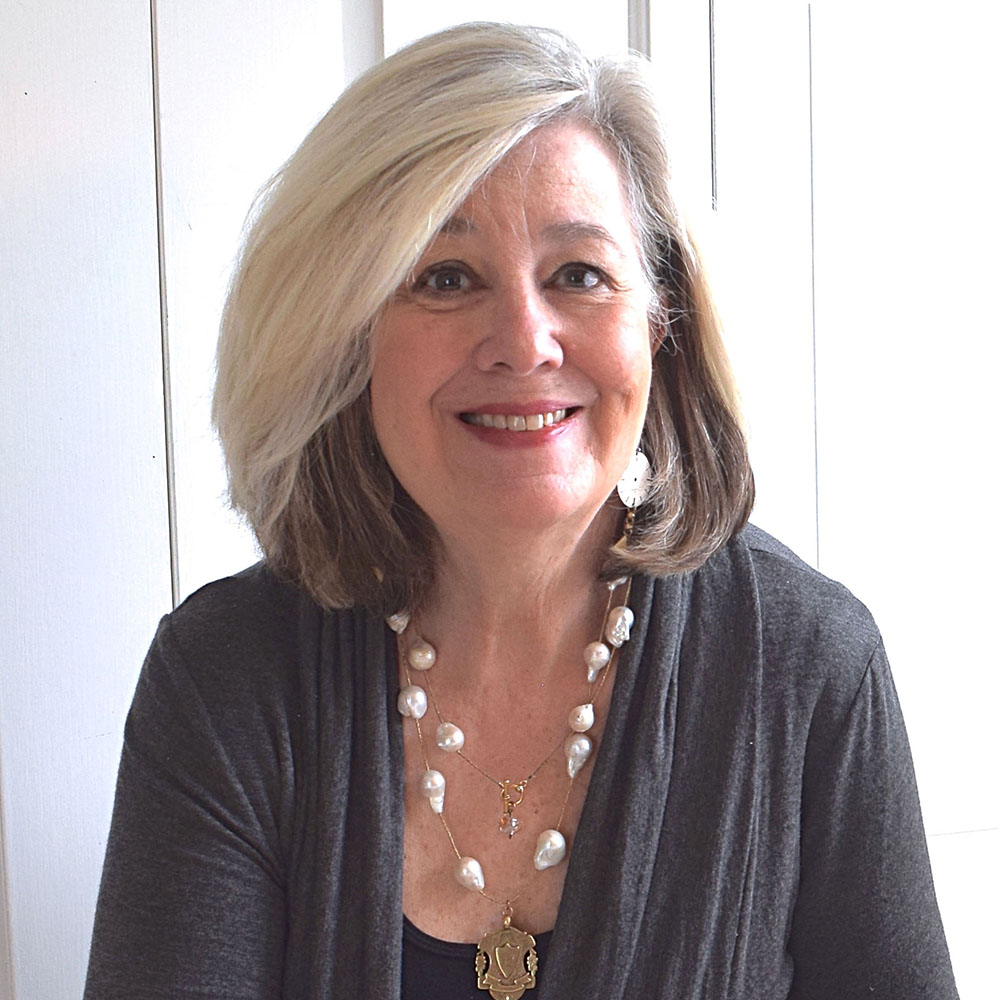
Decorative Finish: Abstract Circles

Abstract Circles decorative finish
DECORATIVE FINISH HOW-TO

Abstract Circles

Artist: Debbie Hayes

Share this article

PROJECT SUPPLIES:

INSTRUCTIONS:

ARTIST NOTE: Scale is everything with this finish. For example, on a focus wall, the scale should be quite large, versus on an art canvas. So adjust the size of the scale accordingly.

1 | Roll on 2 coats of primer. Let dry between coats.

2 | Trowel on 2 coats of Venetian Plaster. Let dry between coats.
(Photo 1)

3 | Pour a bit of Red Oxide and Burnt Sienna onto a paper plate. Press a styrofoam cup into the paint. Apply the cup to the surface to make a pattern. Let dry.
(Photos 2-3)

4 | Brush a mix of Titanium White and Raw Umber paint onto large bubble wrap. Press it onto the surface and remove. Let dry.
(Photos 4-5)

5 | Pour some Red Oxide and Hansa Yellow Opaque paint onto a piece of wax paper. Use a roller to mix the paint slightly, leaving colors blended and unblended. Flip the wax paper onto the surface and burnish with your hand.
(Photos 6-7)

6 | Remove the paper. Let dry. Repeat as you like.
(Photo 8)

7 | Dip a pencil eraser into Carbon Black and make a series of dots on the surface. Let dry.
(Photo 9)

8 | Use a foam brush to create 1 freeform square using WundaSize. Let come to tack. 
(Photo 10)

9 | Lay a piece of gold foil onto the WundaSize. Burnish with a soft brush.
(Photo 11)

Here is the final finish.
(Photo 12)

Featured Products

About the Artist
Debbie Hayes earned a BA in Fine Arts, concentrating on painting, and has spent 95% of her career as a full-time artist. She is a book illustrator, graphic artist, art director, photographer, stylist, website designer, writer, faux finisher for 20 years, and DIY tutorial blogger. Many decorative painters know her from events like the annual ArtFusion Event and IDAL Decorative Artisans League where she has been an instructor, teaching various faux finishing techniques using the products and stencils she loves most.

More from this artist

Looking for more inspiration? Click here to view all of the decorative finishes from our Limited Edition Collections.

Decorative Finish: Watercolor Ombre

Watercolor Ombre decorative finish
DECORATIVE FINISH HOW-TO

Watercolor Ombre

Artist: Decorative & Faux Finishes

Share this article

PROJECT SUPPLIES:

INSTRUCTIONS:

1 | Basecoat in Benjamin Moore White Dove eggshell finish with a low nap roller and let dry. Using a low nap roller, apply White Veil Metallic Paint to coat as desired and let dry.

Tip: The velvet texture of the Golden Paintworks Pre-Mixed Metallic Paint holds the glazes beautifully without absorbing like a flat paint, and without sliding like it would on a paint with a sheen.

2 | Mix one cup Glazing Medium and one teaspoon Slow Dry Fluid Acrylics Phthalo Blue (Green Shade). Brush unevenly onto the bottom third of your area. Pour a small amount of the mixture into another container and add 2 drops of Slow Dry Fluid Acrylics Carbon Black. Apply a small amount by the base board or corner with a chip.
(Photo 1)

3 | Soften the strokes with a badger brush.
(Photo 2)

Tip: For best results, offload excess glaze from your badger brush onto a cotton rag after each softening step throughout the finish.

4 | Mix one cup Glazing Medium with ½ teaspoon Slow Dry Fluid Acrylics Phthalo Blue (Green Shade) and ½ teaspoon Slow Dry Fluid Acrylics Hansa Yellow Opaque to create your green glaze. Apply roughly with chip brush into the middle third of the area you are finishing. Make sure you blend down into the blue that is already applied. Soften with badger brush.
(Photo 3)

5 | Add a thicker area of product combining all your colored glazes to create a drippy accent. Dip your messy brush into denatured alcohol and dab the accent area to release the drips. Repeating the use of the badger brush again, very gently brush higher to lower, leaving excess glaze at lower edge.
(Photo 4)

6 | Use a stain rag pad dipped in clean Glazing Medium to tap edge of the pad into the blue. Swirl the pad on the remainder of your surface, blending into the green area. Soften with a badger brush.
(Photo 5)

7 | Add some of your blue glaze and blue/black glaze into the upper corner and towards your green glaze area, using your designated blue glaze chip brush. Soften with your badger brush for the final finish.
(Photo 6)

8 | Let dry. If desired, roll on Golden Paintworks Clear Topcoat Satin. Here is the final finish.
(Photo 7)

Featured Products

About the Artists
Decorative & Faux Finishes, a decorative arts team, has been in business since 1998 creating custom faux finishes and murals for homeowners, designers, businesses, and contractors in the greater Houston area and beyond. The team has studied under master artisans from all over the world. With dedication to this art, Decorative and Faux Finishes provides experience, talent, and attention to detail. While sensitive to every client’s desired style and budget, they receive the benefit of a certified professional finisher eager to create something special… just for you.

Learn more about Decorative & Faux Finishes in our Behind the Texture artist feature series.

More from this artist

Looking for more inspiration? Click here to view all of the decorative finishes from our Limited Edition Collections.

Decorative Finish: Urban Luxe

Urban Luxe decorative finish
DECORATIVE FINISH HOW-TO

Urban Luxe

Artist: Decorative & Faux Finishes

Share this article

PROJECT SUPPLIES:

INSTRUCTIONS:

1 | Basecoat in Sherwin Williams Folksy Gold satin or color of choice. Let dry.
(Photo 1)

2 | Mix Slow Dry Fluid Acrylics in Carbon Black into the Metallic Texture Tint Base Pearl to a dark charcoal or desired color. Trowel randomly over 70% of surface. Let dry.
(Photo 2)

3 | Roll Foil/Leaf Size adhesive randomly on surface and let set up.
(Photo 3)

4 | Lay down Foil/Leaf squares on sized areas. This sample has groupings of 2 – 4 squares. Let dry.
(Photo 4)

Tip: You could also substitute Golden Paintworks Pre-Mixed Metallic Paint in Silver or Bright Silver randomly on surface.

5 | Mix Weathered Granite with a little Slow Dry Fluid Acrylics in Raw Umber to desired color. Trowel randomly, leaving some of previous steps still showing. Let dry.
(Photo 5)

6 | Mix 2 Sandstone mixtures:

a) Sandstone with a little Slow Dry Fluid Acrylics in Raw Umber, and

b) Sandstone with a little Slow Dry Fluid Acrylics in Carbon Black.

7 | Pop on both colors with a trowel wet on wet over 25 – 30% with previous layers still showing in areas. Do not apply heavily.
(Photo 6)

8 | Lightly blend with a trowel and then a barely damp stain pad or flat sponge. If a lighter look is needed, you can skip trowel a bit of un-tinted Sandstone.
(Photo 7)

9 | Mix Glazing Gel with Slow Dry Fluid Acrylics in Raw Umber and Black to desired color. Tape off random lines across the surface and run product along tape line with a brush. You can use some of your leaf lines as guides. Remove the random tape lines and let dry.
(Photo 8)

10 | Mix Glazing Medium with Slow Dry Fluid Acrylics in Raw Umber to desired color. Add just a little to surface randomly and blend with a barely damp stain pad or flat sponge. Let dry. If desired, roll on Golden Paintworks Clear Topcoat Satin. Here is the final finish.
(Photo 9)

Featured Products

About the Artists
Decorative & Faux Finishes, a decorative arts team, has been in business since 1998 creating custom faux finishes and murals for homeowners, designers, businesses, and contractors in the greater Houston area and beyond. The team has studied under master artisans from all over the world. With dedication to this art, Decorative and Faux Finishes provides experience, talent, and attention to detail. While sensitive to every client’s desired style and budget, they receive the benefit of a certified professional finisher eager to create something special… just for you.

Learn more about Decorative & Faux Finishes in our Behind the Texture artist feature series.

More from this artist

Looking for more inspiration? Click here to view all of the decorative finishes from our Limited Edition Collections.

Decorative Finish: Golden Links

Golden Links decorative finish
DECORATIVE FINISH HOW-TO

Golden Links

Artist: Decorative & Faux Finishes

Share this article

PROJECT SUPPLIES:

INSTRUCTIONS:

1 | Basecoat in Sherwin Williams Folksy Gold satin or color of choice, and let dry.
(Photo 1)

2 | Roll on the 24K Gold Metallic Paint or color of choice. Repeat if necessary, and let dry.
(Photo 2)

3 | Spray the back side of the Antiquity Stencil 2 part pattern or stencil of choice with stencil adhesive. Using a bondo scraper, pull over Weathered Granite through Part 1 of the Wallover stencil. Slight bleed under is okay. Let dry.
(Photo 3)

4 | Line up and tape Part 2 of stencil (dots) over Part 1 and lightly trowel Weathered Granite through dots. They do not have to be perfect. Let dry.
(Photo 4)

5 | Mix 1 part Glazing Medium with 3 parts Weathered Granite to allow it to move a little easier. Chip brush randomly in vertical pattern over 85% of stencil sections, and while wet, pull over stenciled patterns with a bondo scraper, applying pressure in a vertical and horizontal direction. A linen affect will naturally happen on the flat gold areas. Let dry.
(Photo 5)

6 | Mix the Glazing Medium with Slow Dry Fluid Acrylics in Raw Umber to desired color. Apply liberally to the surface and while wet, pull off desired amount of glaze using a damp stain pad or sponge, pulling off in a vertical movement and then across with a horizontal movement to create a linen look. Let dry.
(Photo 6)

7 | If desired, roll on Golden Paintworks Clear Topcoat Satin. Here is the final finish.
(Photo 7)

Featured Products

About the Artists
Decorative & Faux Finishes, a decorative arts team, has been in business since 1998 creating custom faux finishes and murals for homeowners, designers, businesses, and contractors in the greater Houston area and beyond. The team has studied under master artisans from all over the world. With dedication to this art, Decorative and Faux Finishes provides experience, talent, and attention to detail. While sensitive to every client’s desired style and budget, they receive the benefit of a certified professional finisher eager to create something special… just for you.

Learn more about Decorative & Faux Finishes in our Behind the Texture artist feature series.

More from this artist

Looking for more inspiration? Click here to view all of the decorative finishes from our Limited Edition Collections.

Decorative Finish: Abstract Opal

Abstract Opal decorative finish
DECORATIVE FINISH HOW-TO

Abstract Opal

Artist: Decorative & Faux Finishes

Share this article

PROJECT SUPPLIES:

INSTRUCTIONS:

1 | Basecoat in Benjamin Moore White Dove OC-17 eggshell sheen with low nap roller and let dry. Roll on the White Veil Metallic Paint with low nap roller and let dry.

2 | Mix two color glazes. First, mix your blue glaze with one part Glazing Medium to one part Phthalo Blue (Green Shade) Slow Dry Fluid Acrylics. Second, mix your green glaze with two parts Golden Paintworks Glazing Medium, one part Phthalo Blue (Green Shade) Slow Dry Fluid Acrylics, and one part Hansa Yellow Slow Dry Fluid Acrylics. Apply the blue and green glazes with a chip brush at desired opal accent areas. A diagonal movement flows nicely. Soften with Badger Brush. Let dry.
(Photo 1)

3 | Trowel the Metallic Texture Tint Base Pearl from the edge of the blue and green glaze. Trowel more on the remainder of your wall in multiple directions. Let dry.
(Photo 2)

4 | Create veins with the 24K Metallic Paint with your trim or artist brush.
(Photo 3)

5 | After everything is dry, very tightly trowel on another layer of Metallic Texture Tint Base Pearl, avoiding the gold.
(Photo 4)

Here is the final finish.
(Photo 5)

Featured Products

About the Artists
Decorative & Faux Finishes, a decorative arts team, has been in business since 1998 creating custom faux finishes and murals for homeowners, designers, businesses, and contractors in the greater Houston area and beyond. The team has studied under master artisans from all over the world. With dedication to this art, Decorative and Faux Finishes provides experience, talent, and attention to detail. While sensitive to every client’s desired style and budget, they receive the benefit of a certified professional finisher eager to create something special… just for you.

Learn more about Decorative & Faux Finishes in our Behind the Texture artist feature series.

More from this artist

Looking for more inspiration? Click here to view all of the decorative finishes from our Limited Edition Collections.

Decorative Finish: Metallic Raised Faux Bois

Metallic Raised Faux Bois decorative finish
DECORATIVE FINISH HOW-TO

Metallic Raised Faux Bois

Artist: Caroline Lizarraga

Share this article

PROJECT SUPPLIES:

INSTRUCTIONS:

1 | Basecoat with two coats of Moondust Metallic Paint. Let dry.
(Photo 1)

2 | Mix your Sandstone and White Gold Metallic Paint.
(Photo 2)

3 | Apply an even layer of Sandstone over your Moondust Metallic Paint Base with your trowel of choice. Then with a comb, pull your texture through until you are happy with your woodgrain pattern. Let dry.
(Photo 3)

4 | Mix Sheer Glazing Medium with Bright Silver Metallic Paint. Brush a thin layer over all of the design. Let dry.
(Photo 4)

Here is the final finish.
(Photo 5)

Featured Products

About the Artist
With hands permanently covered in plaster and paint, Caroline Lizarraga is happiest working in Old World ways. She trained for her craft in the cobblestoned streets of Florence, Italy, and continues to bring that antiquated sensibility to all of her projects today. You’ll find her on every job site, working each layer of color and detailing solely by hand. She’s passionate not only about creating amazing interior environments but also in helping her clients find and express their own distinctive style. No two jobs are ever alike. Whether it’s a boutique hotel in Napa Valley, an expansive winery estate, or a private residence, her approach is always the same: create a space that is utterly authentic and magically artful.

More from this artist

Looking for more inspiration? Click here to view all of the decorative finishes from our Limited Edition Collections.

Decorative Finish: Raised Metallic Mermaid Tail

Raised Metallic Mermaid Tail decorative finish
DECORATIVE FINISH HOW-TO

Raised Metallic Mermaid Tail

Artist: Caroline Lizarraga

Share this article

PROJECT SUPPLIES:

INSTRUCTIONS:

1 | Basecoat with two coats of Benjamin Moore Kendall Charcoal. Let dry.
(Photo 1)

2 | Mix the Glass Bead Gel with Slow Dry Fluid Acrylics in Carbon Black for a mid-dark gray and a bit of water to make it easier to roll.
(Photo 2)

3 | Lay your stencil pattern down and secure with tape or stencil adhesive to prevent seepage. In this case, we were going for the look of a mermaid tail, so we used a scallop pattern. Roll on a base of the tinted, thinned Glass Bead Undercoat over the stencil, ensuring it doesn’t seep under. Remove the stencil to clean it and let the pattern dry.
(Photo 3)

4 | Mix your Glass Bead Gel XL with Bright Silver Metallic Paint (60%) and Pewter Metallic Paint (40%).
(Photo 4)

5 | Brush the custom colored Glass Bead Gel XL over the pattern carefully.
(Photo 5)

6 | Dry areas before laying the stencil over the wet parts. Once done, let dry completely.
(Photo 6)

Here is the final finish.
(Photo 7)

Featured Products

About the Artist
With hands permanently covered in plaster and paint, Caroline Lizarraga is happiest working in Old World ways. She trained for her craft in the cobblestoned streets of Florence, Italy, and continues to bring that antiquated sensibility to all of her projects today. You’ll find her on every job site, working each layer of color and detailing solely by hand. She’s passionate not only about creating amazing interior environments but also in helping her clients find and express their own distinctive style. No two jobs are ever alike. Whether it’s a boutique hotel in Napa Valley, an expansive winery estate, or a private residence, her approach is always the same: create a space that is utterly authentic and magically artful.

More from this artist

Looking for more inspiration? Click here to view all of the decorative finishes from our Limited Edition Collections.

Decorative Finish: Inlay Horn

Inlay Horn decorative finish
DECORATIVE FINISH HOW-TO

Inlay Horn

Artist: Caroline Lizarraga

Share this article

PROJECT SUPPLIES:

INSTRUCTIONS:

1 | Basecoat with two coats of Benjamin Moore Rich Cream. Let dry. Measure out your pattern with a ruler. It can be as simple or as complex as you’d like. We chose a rectangle design.
(Photo 1)

2 | Mix your Slow Dry Fluid Acrylic colors with Glazing Gel. For horn, you need very earthy, natural colors. We used Carbon Black, Titanium White, Burnt Umber, Raw Umber, Raw Sienna, Yellow Oxide, and Burnt Sienna. We also keep a water spray bottle nearby to keep the materials moving.
(Photo 2)

3 | Decide which areas will be darker horn or lighter horn and tape the areas you will work on first. The low-tack tape protects the area next to it from being painted, and when repeated for the next paint area, it adds to the inlay look. If you look at horn closely, it has a natural curve, so our color layering is curved. In this photo, we are using highlights of the Burnt Sienna mix over a dry Carbon Black mix. For others, we used the Rich Cream as a base. Every color has a designated brush and there is one brush to merge each area with several colors. Once that area is dry, tape the next area, choose the colors and paint. Do the curve in another direction, so it looks inlaid. 
(Photo 3)

Here is the final finish. Enjoy!
(Photo 4)

Featured Products

About the Artist
With hands permanently covered in plaster and paint, Caroline Lizarraga is happiest working in Old World ways. She trained for her craft in the cobblestoned streets of Florence, Italy, and continues to bring that antiquated sensibility to all of her projects today. You’ll find her on every job site, working each layer of color and detailing solely by hand. She’s passionate not only about creating amazing interior environments but also in helping her clients find and express their own distinctive style. No two jobs are ever alike. Whether it’s a boutique hotel in Napa Valley, an expansive winery estate, or a private residence, her approach is always the same: create a space that is utterly authentic and magically artful.

More from this artist

Looking for more inspiration? Click here to view all of the decorative finishes from our Limited Edition Collections.

Decorative Finish: Black Venetian Plaster with Beaded Strands

Black Venetian Plaster with Beaded Strands decorative finish
DECORATIVE FINISH HOW-TO

Black Venetian Plaster with Beaded Strands

Artist: Caroline Lizarraga

Share this article

PROJECT SUPPLIES:

INSTRUCTIONS:

1 | Mix the Soapstone with the Carbon Black Slow Dry Fluid Acrylics to a solid black.
(Photo 1)

2 | Apply 3 coats of Soapstone. Burnish in between coats to increase the shine. Let dry.
(Photo 2)

3 | Rub Glazing Gel over the entire area and buff to a shine with a soft rag. Let dry.
(Photo 3)

4 | Mix two separate color batches of a) Glass Bead Gel with Silver Metallic Paint and b) Glass Bead Gel with Bright Silver Metallic Paint. We mix two to give the design dimension. Pour each color mix into separate squeeze bottles. Start piping your desired pattern of beaded strands onto the wall using a guide (such as chalk) or organically. Let dry.
(Photo 4) 

Here is the final finish.
(Photo 5)

Featured Products

About the Artist
With hands permanently covered in plaster and paint, Caroline Lizarraga is happiest working in Old World ways. She trained for her craft in the cobblestoned streets of Florence, Italy, and continues to bring that antiquated sensibility to all of her projects today. You’ll find her on every job site, working each layer of color and detailing solely by hand. She’s passionate not only about creating amazing interior environments but also in helping her clients find and express their own distinctive style. No two jobs are ever alike. Whether it’s a boutique hotel in Napa Valley, an expansive winery estate, or a private residence, her approach is always the same: create a space that is utterly authentic and magically artful.

More from this artist

Looking for more inspiration? Click here to view all of the decorative finishes from our Limited Edition Collections.

Decorative Finish: Persian Blue

Persian Blue decorative finish
DECORATIVE FINISH HOW-TO

Persian Blue

Artist: Beth Warnecke

Share this article

PROJECT SUPPLIES:

INSTRUCTIONS:

1 | Basecoat with two coats of Benjamin Moore Rustic Taupe, and let dry. Mix Weathered Granite with up to 20% water to thin for rolling. Mix to a whipped consistency. Roll on a medium even coat with the whizz roller, making sure you have stippled peaks from the rolling. Let dry.
(Photo 1)

2 | Mix each Sherwin Williams color with the Soapstone with a ratio of 4 parts Soapstone to 1 part paint. It will dry slightly lighter than the paint color. Then add 20% water to each mix to make a thick glazing material. Using chip brushes, brush on each Soapstone mixture in a vertical, organic fashion at 90% coverage.
(Photo 2)

3 | Using the neon leon brush, blend the colors together vertically then horizontally, allowing some glaze to have “threadlike” patterns. Do not over blend, leaving a bit of the original Weathered Granite peaking through. Let dry.
(Photo 3)

4 | Spray back of stencil with adhesive. After setting up, position stencil and apply foil size generously with a large stencil brush. Do not worry about bleed through. Remove the stencil and using a chip brush, wipe horizontally spreading any extra foil size into thread-like patterns. Let foil size set up and then vigorously scrub foil onto the size, making sure it gets into high dimensional stippled granite. This may require a few passes.
(Photo 4)

5 | Make a mix of Glazing Gel and the original Rustic Taupe base paint at a ratio of 4:1. Also have untinted Glazing Gel ready in a separate tray. Roll on the Rustic Taupe Glazing Gel mix and clear Glazing Gel randomly, scrubbing in with the leon neon, making sure to have organic light and darker areas of glaze. Let dry.
(Photo 5)

6 | Sand the peaks with 220 grit sandpaper (using a sander for large areas) to reveal the original untinted weathered granite.
(Photo 6)

7 | Make two mixes using the Metallic Texture Tint Base Pearl with the original Rustic Taupe paint basecoat:

a) One very light mix looking like a creamy pearl, and

b) One slightly darker, close to a light taupe.
(Photo 7)

8 | Using a steel trowel edge, chop in lines of each mixture onto the finish in an organic fashion.
(Photo 8)

9 | While still wet, pull a wallpaper brush through, giving the lines a silky thread look. Let dry.
(Photo 9)

Here is the final finish.
(Photo 10)

Featured Products

About the Artist
Beth Warnecke is the owner and artist behind Classic Creations Painting, providing beautiful wall and ceiling finishes for commercial and residential spaces in the metro St. Louis, MO area. She has a passion and love for fine finished furniture and cabinetry, which comprises half of her business. Always immersed in the latest design trends and gorgeous pictures, she considers staying up to date with the latest design trends one of her top priorities when bringing timeless beauty into clients’ homes.

Learn more about Beth in our Behind the Texture artist feature series.

More from this artist

Looking for more inspiration? Click here to view all of the decorative finishes from our Limited Edition Collections.